Introduction 2 - Description of the Scratch environment
Scenarios dedicated to primary school learners, 4th - 6th grade (basic level) These materials have been developed by Ośrodek Edukacji Informatycznej i Zastosowań Komputerów (Centre for Information Technology Education and Application of Computers) in Warsaw as part of the “Mistrzowie Kodowania” (“Coding Masters”). Programme funded by Samsung Electronics Polska, licensed under CC BY-SA “Attribution – Share Alike 3.0”.
Spis treści
- 1 Description of the Scratch environment
- 1.1 Home page and menu
- 1.2 Web browser Scratch 2.0 environment – main menu
- 1.3 Web browser Scratch 2.0 environment – the stage
- 1.4 Web browser Scratch 2.0 environment – the sprite panel
- 1.5 Web browser Scratch 2.0 environment – the resource panel
- 1.6 Sprite scripts
- 1.7 Sprite costumes
- 1.8 Sounds
- 1.9 All Scratch blocks
Description of the Scratch environment
The Scratch environment is used to create interactive stories, games, animations and images using script built with ready-to-use blocks. In 2013 a new version (Scratch 2.0) was released, available foruse at http://scratch.mit.edu. It is not necessary to install the programme, but access to the Internet is needed.
Since September 2013 an off-line version has also been available, which can be run on the user’s computer with no network connection. The two versions are very similar. The web version is described in detail in this document. The description was completed in September 2013, so changes and improvements should be taken into account.
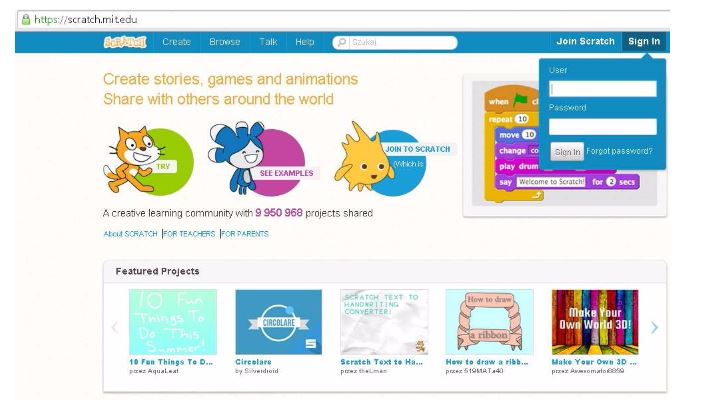
We open our browser and type in the address bar: http://scratch.mit.edu.
The home page of the programme is displayed. The top blue menu bar includes:
- Scratch – go to the home page (this is where we are); • Create – access to the project editor;
- Explore – access to sets of projects developed by Scratch users;
- Discuss – access to a page containing Scratch users’ discussion forums;
- Help – access to a number of auxiliary materials in English, and information on the latest versions of the programme;
- Search box – can be used to search projects, users and studies;
- Join Scratch – sing up for a new user account;
- Sign in – opens a sign in window (for users who already have an account).
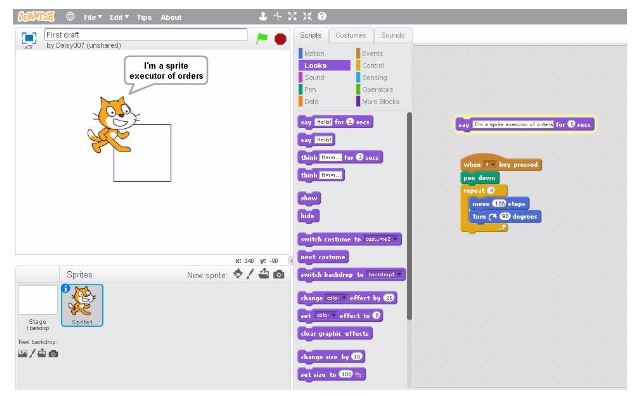
When we click Create on the Scratch home page a project creation window opens. The project window consists of several items. The grey bar at the top contains a menu. On the left there is a stage on which sprites perform scripts. Underneath there is a sprite panel. The right side is taken up by a panel of resources where we can create scripts, costumes and sounds.
The Scratch menu consists of the following items (from left to right):
Scratch logo – access to the Scratch home page (the starting page)
Globe – choice of the language used in the environment
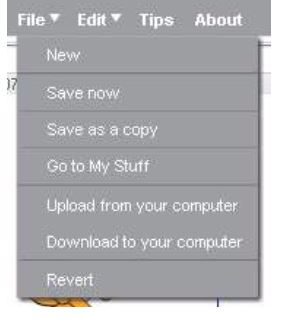
File – saving and opening projects:
- New – creating a new project
- Save now – saving on the web page (saving also takes place automatically at a certain interval)
- Save as copy – saving on the web page under a new name
- Go to My stuff – opening a list of the user’s projects
- Upload from your computer – opening a project from the disk
- Download to your computer – saving a project to the disk
- Restore – loading the last open version of the project (if we want to discard changes made in the project)
Project save and read options (Save, Save As, Go to My stuff) are available for signed-up users only.
Edit – allows us to use the following options:
- delete – delete objects
- Small stage layout – reduce the stage size and enlarge the resources panel (scripts ...),
- Turbo mode – accelerate the execution of scripts.
Tips – displaying the help window (which opens on the right)
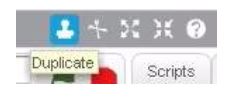
Picture menu – selecting a picture will attach a tool to the cursor, we click the cursor on an object to perform an operation on it:
- Stamp – Duplicate – duplication of an object (sprite, script ...)
- Scissors – Delete – deletion of an object
- Arrows out – Grow – zooming in on an object (the more clicks on an object, the more the object grows)
- Arrows in – Reduce – reduction of an object
- Question mark – Help regarding a block – clicking on an object opens a help window for the object (not just the block)
When we sign in, the right side of the menu contains the following items:
- Saved – indicates that the current project status is saved on the web page
- Folder with the letter S – access to a list of the user’s projects (My Stuff)
- Username – drop-down menu allowing us to:
- Profile – access modifications to user details
- My Stuff – access to a list of the user’s projects
- Account settings – access to modifications of account settings
- Sign out – sign out (without closing the programme)
- Profile – access modifications to user details
Two additional buttons under the menus cause the following:
Share – access to a project description page which also saves the project and shares it with other users
See the project page – access to a project description page where we can add instructions (Instructions) on how to use the project as well as notes and acknowledgments (Notes and Credits)
If we are not signed on, the right side of the menu contains only the option Sign in.
Web browser Scratch 2.0 environment – the stage
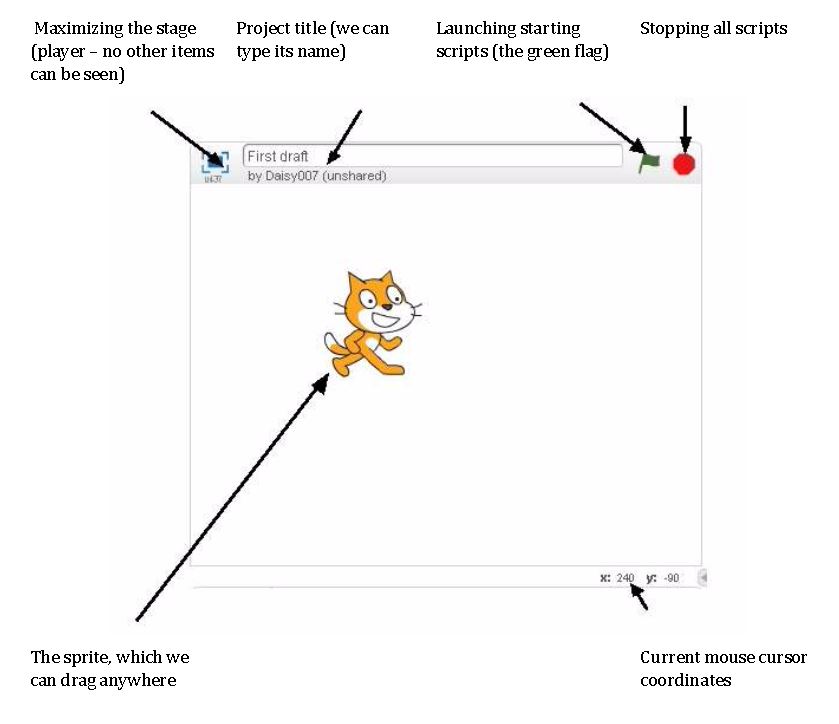
The stage is a window in which the project is implemented. This is where sprites execute scripts.
Web browser Scratch 2.0 environment – the sprite panel
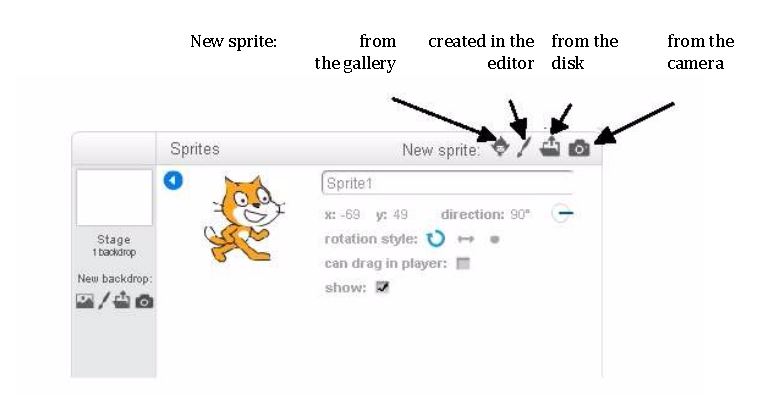
The sprite panel contains information on all sprites placed in the project. Here we can create a new sprite. We can also select (click) the stage and set its background.
When we click the blue circle with the letter “i” in the upper left hand corner of the sprite image we can see information about the sprite’s properties:
• name window – we can change the name of the sprite
• x, y – current coordinates of the sprite on the stage
• sprite movement direction (we can change it by pulling the blue line)
• rotation style:in a circle – that is any rotation, horizontally – rotation only to the right and to the left dot – no rotation
• can drag in player – when we select the square we will be able to drag the sprite with the maximized stage site (i.e. in the player)
• show – after unchecking the square the sprite will be hidden (the same is done by the hide block)
Web browser Scratch 2.0 environment – the resource panel
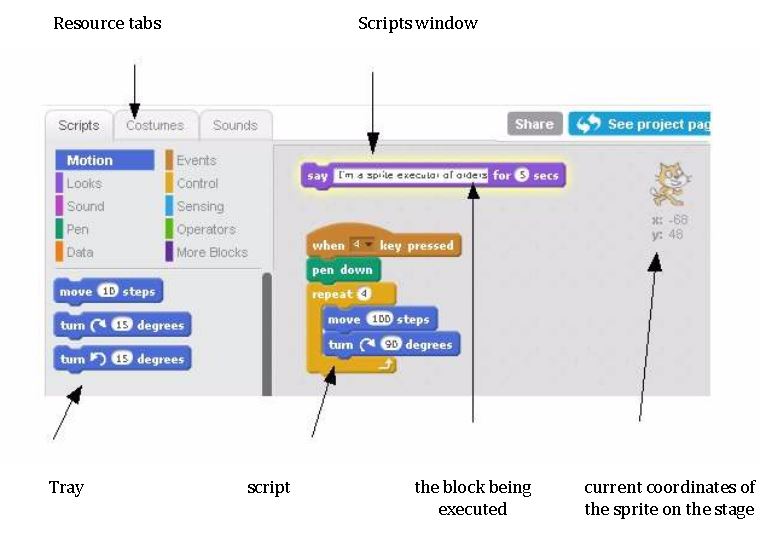
This part of the environment shows the resources of a selected object – sprite or stage. Resources include: scripts, costumes and sounds. We select them by clicking the appropriate tab.
Sprite scripts
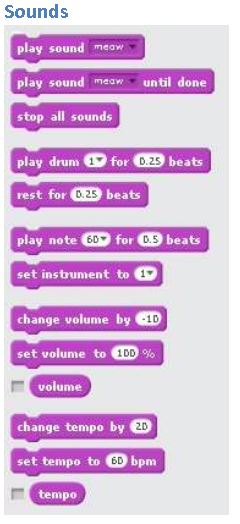
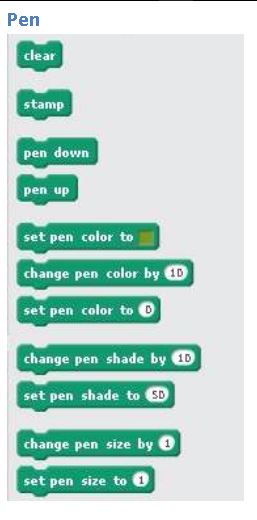
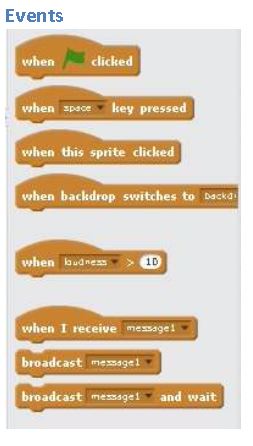
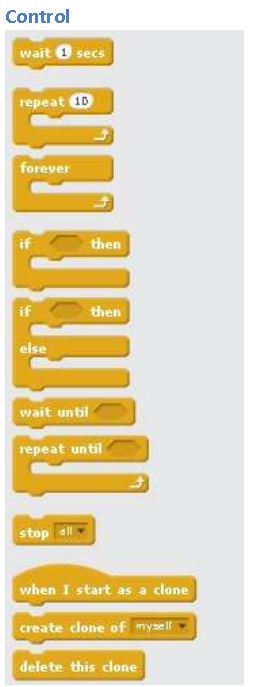
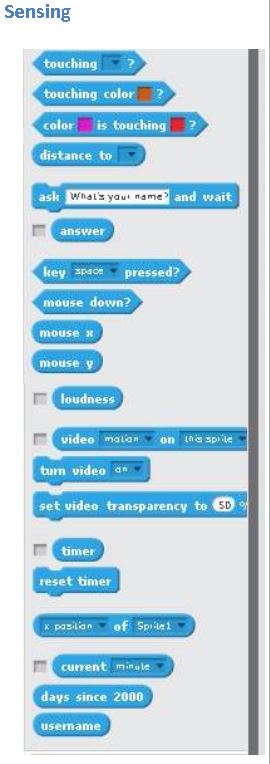
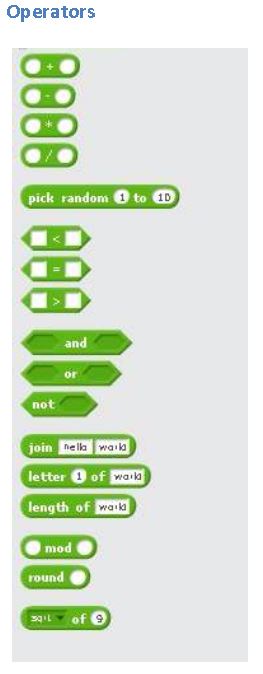
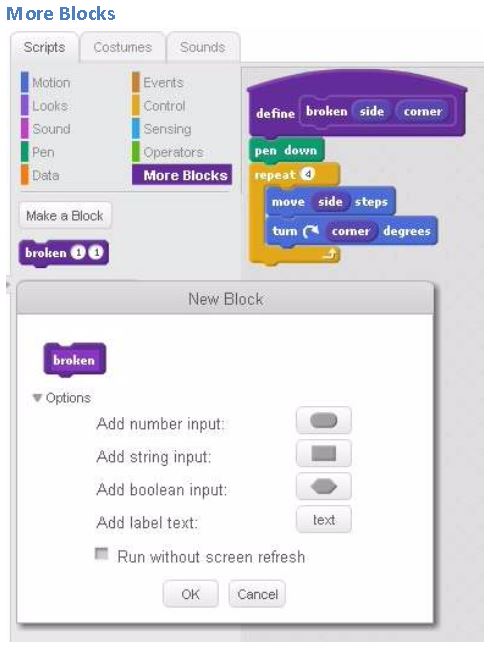
In the new Scratch version (2.0) there are 10 groups of blocks with which we build sprite scripts. Each sprite may have different scripts. Scripts are built by dragging blocks from the tray to the right side – to the scripts window. A block can be removed by dragging it outside this window. A block can be made by clicking on it both in the tray and in the scripts window. A block or script being executed has a yellow border. Some blocks have windows which can be filled in (with numbers, text, or by selecting values).
Sprite costumes
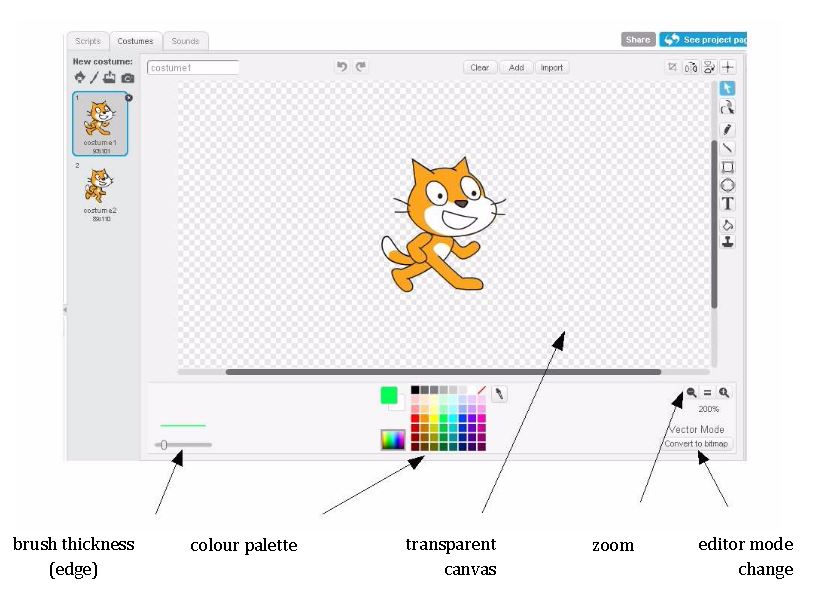
When we select the tab costume1, we can change sprite costumes, i.e. sprite pictures. The tray contains all of the sprite’s costumes. The panel on the right side is now a graphics editor where we can create or change a costume. The editor can work in two versions: vector (Vector mode) or bitmap (bitmap mode). The latter is a Paint style editor. Just like in the script panel, here we can choose a new costume. It will be added as another sprite costume. To delete a costume we need to choose one from the tray and click the “x” in the right upper hand corner of the picture.
Sounds
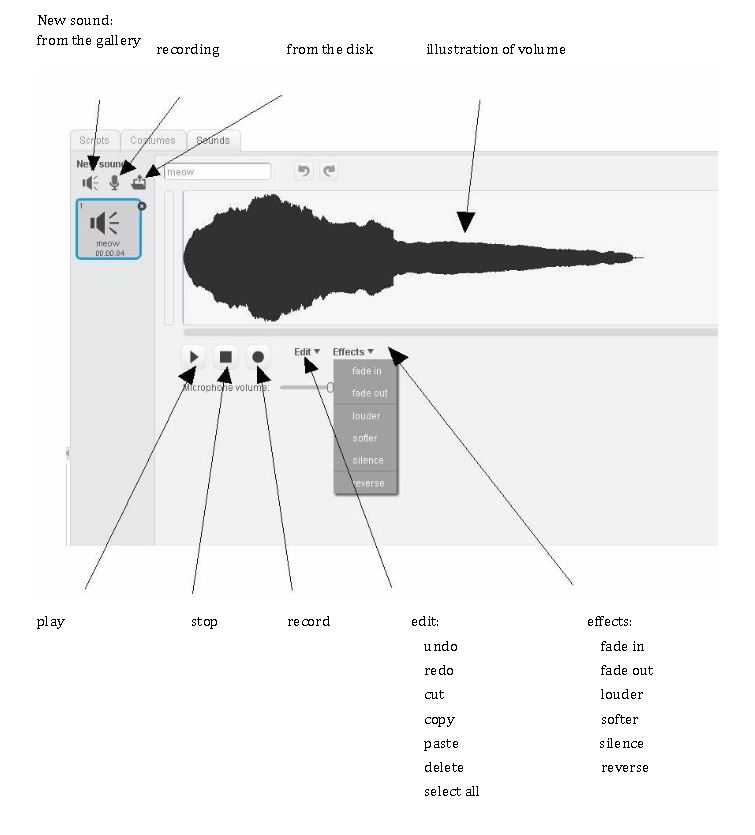
After we select the Sounds tab we can change and add sounds for a sprite. We have the option to add new sounds and process them.

