Module 8 - The “Multimedia Christmas Card” Project

These materials have been developed by OśrodekEdukacjiInformatycznejiZastosowańKomputerów (Centre for Information Technology Education and Application of Computers) in Warsaw as part of the “MistrzowieKodowania” ("Coding Masters”) Programme funded by Samsung Electronics Polska, licensed under CC-BY-SA “Attribution – Share Alike 3.0 Poland”
Spis treści
Information
Objectives
General objectives:
- Review and revision of previously presented Scratch commands and language structures;
- Development of a multimedia Christmas card scenario;
- Its implementation in the Scratch environment.
Specific objectives:
- The student will understand and be able to use appropriate structural instructions.
- The student will be able to use the message mechanism and program responses to events.
- The student will understand the concepts of global and local variables and will be able to use then in the programme.
- The student will be able to design and implement a multimedia Scratch animation in which many stages and animated sprites are used.
Stages
Discussion of solutions of module VII additional tasks
Time to complete this part: about 10 minutes
At the beginning of the lesson we remind students what they were supposed to prepare between classes. We invite a volunteer to present his/her solution. We ask if anyone had a different way of finding a solution. We discuss the solutions (praising correct solutions to individual tasks).
If there was no homework, we start by repeating key issues from the previous module. We also ask if students have any doubts regarding their own projects. If anyone wants to show something he/she is proud of, we let him/her do it.
Introduction
Time to complete this part: about 15 minutes
We explain that this last lesson will be different than the previous ones. We propose to split students into groups of 2–3 people. We say that each team will design its own multimedia Christmas card.

We discuss what functionalities the card should have(animation, sounds), talk about how probably it will make use of animated sprites and more than one stage. We point out that we can develop graphics ourselves, we can also take advantage of Internet resources and search for appropriate images. The same goes for sounds – we can compos them with the use of blocks of the Sound category, record our own greetings or a Christmas carol, or play an audio file of a carol.


Developing card scenarios by the students
Time to complete this part: about 20 minutes
Task: We ask the students to start planning their scenarios. We write down the plan on pieces of paper or in a word processor. When the students are creating their scenarios we give advice and check to make sure the adopted plans neither go beyond their programming capabilities nor are too simple (e.g. do not require any programming at all).We also remind them, depending on the needs, e.g. how to handle messages, variable or randomness.
If we have more time, or if students find the task difficult, in this part we can present a sample card scenario and its implementation (two examples are provided further in this module).

Implementing cards by the students
Time to complete this part: about 35 to 40 minutes (in the classroom)
This part may be carried out in two variants, during the same lesson or at home. During the implementation in the classroom we check students’ progress on an ongoing basis and help them if necessary. If the cards are implemented at home, we tell students that during the second part of the class there will still be time for corrections and modifications, questions and obtaining help from the teacher. At the beginning of the second meeting we ask students what they managed to do and what they failed to achieve, and what problems they encountered. We help, explain the resulting difficulties, and provide time for the students to refine their projects.
Presentation of cards by student teams
Time to complete this part: about 5–10 minutes
We ask individual teams to present their work on the interactive whiteboard or using the projector.
Add-ons:
Sample scenario I:“Santa Claus Falls Down the Chimney”
In this scenario, we use ready-made drawings. They have been developed specifically for the “Masters of Coding” programme and can be used in students’ projects. The source of the Christmas tree picture from the last scene is the openclipart.org website offering free graphics. To find Christmas trees it is enough to type Christmas tree in the website’s search box.
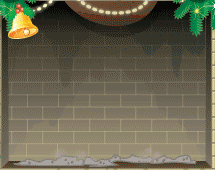
Scene 1 A house in winter scenery, with a chimney on the roof.

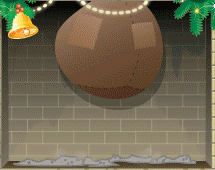
Scene 2
After a specified time, e.g. 1 second, the chimney is zoomed in on. Santa Claus comes flying with a bag of presents and falls down the chimney.

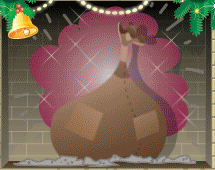
Scene 3 A room with a fireplace. Santa Claus comes out of the fireplace with a bag of presents.

Scene 4
Christmas greetings. Christmas tree and greetings (“Merry Christmas from the Masters of Coding”).

The animated Santa Claus falling down the chimney and coming out of the fireplace into the room will be sprites with multiple costumes. Preparing the card we load the first three scenes into a Scratch project (files dom.png, komin.png, pokoj.png, respectively), we prepare the fourth – a Christmas tree and the words of the greetings – in an image editor (sample file zyczenia.png. We create two sprites, load appropriate files as costumes (for Santa Claus falling down the chimney these files are do_komina1.png, ..., do_komina9.png, and for Santa Claus entering the room the files z_komina01.png, ..., z_komina12.png).


After starting the card, or clicking the green flag:
1. We hide all the sprites.
2. We display the first scene.
3. After 1 second we switch to the second scene and we start the animation –Santa Claus falling down the chimney. As the animation will be started by an appropriate sprite script, it must receive the message that it needs to do this.
4. Similarly, after the completion of the first animation, we send a message changing the stage to the third scene and triggering the second animation.
5. After the completion of the second animation we display the greetings stage.
Stage script:

Sprite scripts – Santa Claus falling down the chimney:

Sprite scripts – Santa Claus entering the room:

As a simple additional exercise we can suggest a modification of the last scene (students design their own scene).The design does not include any sound effects, so we can also ask students to add them.
Sample scenario II:“We Light the Lights on the Christmas Tree”
In this scenario the students can prepare all the artwork themselves. In the example, the Christmas tree drawing was downloaded from the website openclipart.org.
Scene 1
On the left side of the stage there is a Christmas tree as a background element (it can be drawn by students in the image editor).There are several (six in the sample project) lights (sprites) on the Christmas tree. Clicking a light with the mouse starts the animation – lighting of the light.

Scene 2 After all the lights have been lit there is a change of scene. The Christmas tree with flashing lights remains, Greetings appear 9”Merry Christmas from the Masters of Coding”).

When we click on the lights we must recognise two situations:
1. Is the light already on or not? For each light, this information must be saved separately, so we need to create a local variable (only for this sprite), e.g. called Lit.
2. Have we switched on all the lights already? Here we will need a global variable that counts switched on lights, e.g. called Counter.
After starting the card, or clicking the green flag: 1. We set the first stage as active, we reset the counter, we set the first costume for thelights, we reset the Lit variable (let zero mean that the light is not blinking). 2. Each click on a light causes the programme to check whether the value of the Lit variable is zero. If so, then:
- we increase the counter by one;
- we set the switching on to one;
- if the counter is equal to the number of lights, we change the scene;
- we run the animation (blinking lights).
Stage script:

Scripts for the light:

The sample project, like the previous one, does not contain any sound effects, it is worth completing it by adding them.
Files to download
- Santa is jumping into the chimney

do_komina1

do_komina2

do_komina3

do_komina4

do_komina5

do_komina6

do_komina7

do_komina8

do_komina9
- Santa is coming into the room
z_komina01
z_komina02

z_komina03

z_komina04

z_komina05
z_komina06

z_komina07

z_komina08

z_komina09

z_komina10

z_komina11

z_komina12


